


Blackwing Lair Raid Guide for WoW Classic Hardcore
Every Blackwing Lair boss explained for new raiders, from Razorgore to Nefarian: abilities, each role’s job, the class jobs and class calls, the dangerous trash, and how a Hardcore raid survives Vaelastrasz.
By Marc · Updated October 28, 2026
Blackwing Lair
Overview
Blackwing Lair is Nefarian’s lair at the top of Blackrock Spire, and the second 40-player raid. It has eight bosses and drops most of Tier 2. The fights are a big step up from Molten Core: more of them have one mechanic that can wipe the raid, and they ask for specific gear (the Onyxia Scale Cloak) and items (Hourglass Sand).
For a Hardcore raid, two fights stand out. Vaelastrasz’s Burning Adrenaline kills whoever it lands on unless they leave the raid in time, and Chromaggus can mind-control players for good. Both are survivable with the right plan, and this guide has it.
40
Players
8
Bosses
60
Level
7 days
Lockout
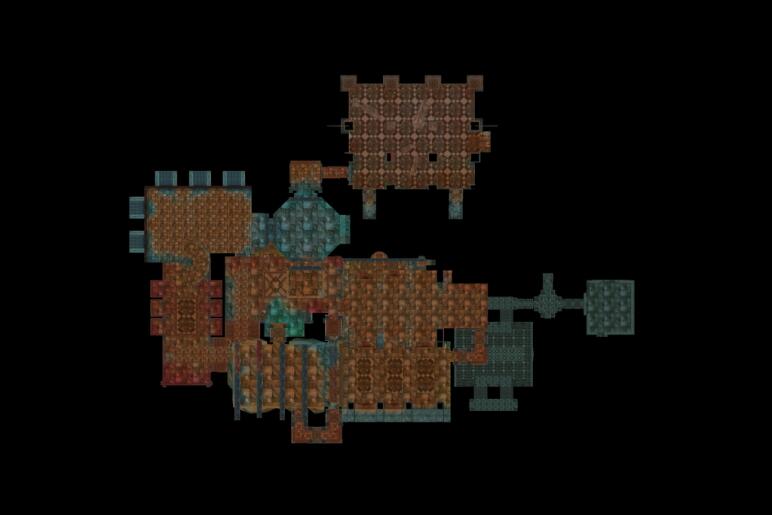
Getting in
- The way in is through Upper Blackrock Spire, past General Drakkisath, or by the Orb of Command in Blackrock Mountain once you’re attuned.
- The attunement, Blackhand’s Command, starts from a note dropped by the Scarshield Quartermaster in Blackrock Mountain. You complete it by killing General Drakkisath in Upper Blackrock Spire and touching the Orb of Command behind him. After that, the Orb of Command near the Blackrock Spire entrance teleports you in.
- Every raider needs an Onyxia Scale Cloak for Firemaw, Ebonroc, Flamegor and Nefarian: their Shadow Flame is deadly without it. It’s crafted from a Scale of Onyxia, skinned from her corpse, with a Cindercloth Cloak and Rune Thread.
- Collect Hourglass Sand before Chromaggus: it’s the only cure for the Bronze affliction. Dragonkin in the raid drop it.
Preparation, role by role
 Tanks
Many fights need a tank swap (Firemaw, Ebonroc, Broodlord, Chromaggus) because of knockbacks and debuffs that stack. The Vaelastrasz tanks need fire resistance and a queue: each one leaves the raid once.
 Healers
Fire damage everywhere: Razorgore’s Fireball Volley, Vaelastrasz’s Fire Nova, Firemaw’s Flame Buffet. Assign cures for Chromaggus’s afflictions before the pull, and keep your Hearthstone ready for Vaelastrasz.
 Melee damage
Watch knockbacks (Broodlord, the three drakes) and Blast Wave. On Nefarian, learn your class call.
 Ranged damage
Kill the add casters on Razorgore, break line of sight on Firemaw, and know your class call on Nefarian.
What each class brings

Hunter
Tranquilizing Shot on Flamegor and Chromaggus.

Mage
Remove curses (Nefarian’s Veil of Shadow) and polymorph adds; on Nefarian, your class call polymorphs raid members, which have to be dispelled.

Priest
Dispel and cure on Chromaggus; Fear Ward the Nefarian tank. During your class call, your heals hurt: shield instead.

Paladin
Cleanse afflictions on Chromaggus, Blessing of Protection on a player in trouble.

Rogue
Disarm the suppression devices before Broodlord Lashlayer.

Warlock
Healthstones before every boss; on Nefarian your class call summons Infernals that have to be banished or tanked.

Shaman
Fire Resistance Totem on Vaelastrasz, Tremor Totem on Nefarian (Horde).
Consumables
- Greater Fire Protection Potions for Vaelastrasz and the drakes.
- Hourglass Sand for Chromaggus: bring a stack per healer group.
- Major Healing and Mana Potions, healthstones; Restorative Potions remove a curse, disease, poison or magic effect.
- Your Hearthstone off cooldown when you reach Vaelastrasz.
Dangerous trash
On Hardcore, the trash between the bosses kills more raiders than the bosses do.

The Suppression Room
Before Broodlord Lashlayer: dragonkin whelps keep hatching, and suppression devices slow everyone near them. Rogues disarm the devices; the raid moves through slowly, pack by pack.

Blackwing Technicians
Goblins in the hall after Vaelastrasz. They throw bombs, and they run to bring more friends when they’re hurt.

Death Talon packs
Dragonkin packs before Chromaggus and Nefarian. Seethers enrage (Tranquilizing Shot), Flamescales burn, and Wyrmguards take extra damage from one school of magic: find it and use it.
The bosses
In the order most raids kill them.
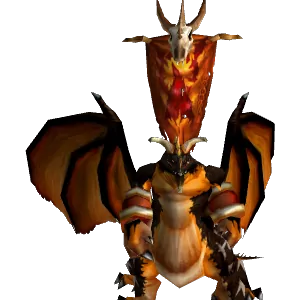
Boss 1 of 8
Razorgore the Untamed
Phase 1: a player controls Razorgore through an orb and has him destroy all 30 eggs while waves of adds attack. Phase 2: Razorgore himself.
Abilities

Destroy Egg
Only Razorgore can destroy the eggs, and only while a player controls him with the Orb of Domination.

Mind Exhaustion
A player who controlled him can’t do it again for a while, so two or three controllers take turns.

Fireball Volley
Phase 2: a fireball at every player at once.

Conflagration
Phase 2: sets his target on fire and makes them lose control.

War Stomp
Phase 2: stuns everyone near him.
Your job
Tanks
Phase 1: tanks hold the adds coming from the sides, away from the orb and its controller. Phase 2: one tank takes Razorgore; a second is ready when Conflagration makes the first lose him.
Healers
Phase 1: the add tanks take the damage. Phase 2: everyone takes Fireball Volleys; group heals.
Melee damage
Phase 1: kill the adds. Phase 2: on Razorgore, but step out when he stomps.
Ranged damage
Phase 1: kill the Blackwing Mages first; they’re casters that hurt. Phase 2: burn Razorgore.
Class jobs
Mage
Polymorph adds that get loose, and keep the controller safe.
Hunter
Pull adds off the controller with Distracting Shot or your pet.
What gets people killed
- Adds reaching the player who controls Razorgore: they can’t defend themselves.
- Phase 2 Fireball Volleys on players who aren’t topped up.
Boss 2 of 8
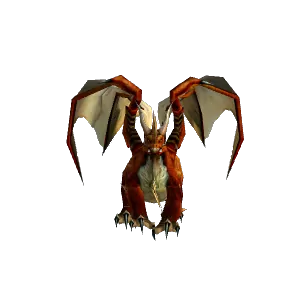
Vaelastrasz the Corrupt
A red dragon who starts at 30% health. He gives the raid endless mana and rage, but his Burning Adrenaline kills its target after 20 seconds.
Abilities

Essence of the Red
At the start, everyone gets endless mana, rage and energy for the fight.

Burning Adrenaline
A player deals far more damage and casts instantly, then dies after 20 seconds. It lands on a random mana user, and on the tank every 45 seconds.

Fire Nova
Fire damage to the whole raid, again and again.

Flame Breath
A cone of fire in front of him.

Tail Sweep
Knocks back everyone behind him.
Your job
Tanks
Line up several tanks with fire resistance. When Burning Adrenaline lands on you, the next tank taunts, and you hearth out straight away.
Healers
Endless mana: heal freely. Fire Nova hits everyone the whole fight. If you get Burning Adrenaline, hearth at once.
Melee damage
Stand at his side, never behind him or in front. Full damage from the first second; the fight should last well under a minute.
Ranged damage
Full damage from the first second: the shorter the fight, the fewer players get Burning Adrenaline.
Class jobs

Warrior
Tanks queue up: each takes over when the previous one gets Burning Adrenaline.
Shaman
Fire Resistance Totem for the tanks and melee (Horde).
Paladin
Fire Resistance Aura (Alliance).
What gets people killed
- Burning Adrenaline itself: it kills its target after 20 seconds, and the blast hurts everyone near them. On Hardcore, whoever gets it uses their Hearthstone right away: the debuff makes it instant, and leaving the raid removes it. Your Hearthstone has a one-hour cooldown, so it’s one escape per raid night.
- A tank who keeps Vaelastrasz after their Burning Adrenaline: hand him over and leave.
- Standing in front of or behind him.
Boss 3 of 8
Broodlord Lashlayer
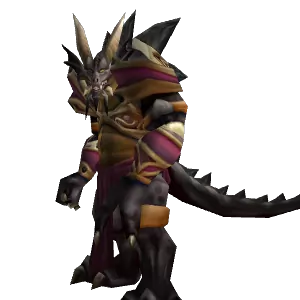
After the Suppression Room. A hard-hitting dragonkin who knocks his tank away.
Abilities

Mortal Strike
A big hit on the tank that also cuts their healing taken.

Knock Away
Knocks the tank back and lowers their threat.

Blast Wave
Fire damage to everyone near him, slowing them.

Cleave
Hits the tank and anyone next to them.
Your job
Tanks
Two tanks, close to each other: when Knock Away throws one back, the other has the threat to take him. Tank him against a wall, so the knockback is short.
Healers
Mortal Strike makes the tank hard to heal: keep them topped up before it lands.
Melee damage
Step back when he casts Blast Wave; you don’t need to stand in it.
Ranged damage
The safest fight here: just stay out of melee range.
Class jobs
Rogue
Disarm the suppression devices in the room before him.
What gets people killed
- The Suppression Room before him, if the raid rushes through it.
- A second tank too far away when the first is knocked back.
Boss 4 of 8
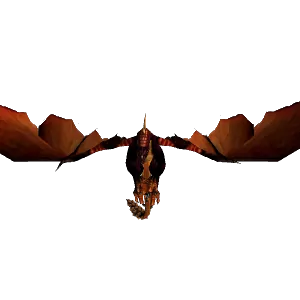
Firemaw
The first of three black drakes. Everyone who can see him builds up Flame Buffet stacks, so the raid steps out of line of sight to clear them.
Abilities

Flame Buffet
Hits everyone in line of sight, and each hit makes the next one stronger. Breaking line of sight clears it.
Shadow Flame
A cone of shadow fire in front of him. Deadly without an Onyxia Scale Cloak.

Wing Buffet
Knocks back everyone in front of him and lowers the tank’s threat.
Your job
Tanks
Two or three tanks swap: when Wing Buffet knocks one back, the next takes over. Tanks build stacks too, so swap before they get too high.
Healers
Heal from behind the corner, out of his line of sight, so you don’t build stacks yourself.
Melee damage
Watch your stacks. When they get high, step behind the corner until they drop off, then come back.
Ranged damage
Same: damage until your stacks get high, then hide to clear them.
Class jobs
Priest
Heal from out of line of sight; Fear Ward isn’t needed here.
What gets people killed
- No Onyxia Scale Cloak: Shadow Flame kills.
- Flame Buffet stacks left to grow; they hurt more every time.
Boss 5 of 8
Ebonroc
The second black drake. His curse heals him whenever he hits the cursed tank, so the tanks swap.
Abilities

Shadow of Ebonroc
Curses his tank: every hit on them heals Ebonroc. Another tank takes over until it fades.
Shadow Flame
A cone of shadow fire in front of him. Deadly without an Onyxia Scale Cloak.
Wing Buffet
Knocks back everyone in front of him and lowers the tank’s threat.
Your job
Tanks
Two tanks: the moment Shadow of Ebonroc lands on you, the other taunts. Swap back when it fades.
Healers
Steady tank damage; watch both tanks during the swaps.
Melee damage
At his side, out of the breath and the buffet.
Ranged damage
An easy fight for ranged: spread out and stay away from his front.
What gets people killed
- No Onyxia Scale Cloak: Shadow Flame kills.
- A slow tank swap: he heals while the cursed tank is hit.
Boss 6 of 8
Flamegor
The third black drake. His Frenzy has to be removed with Tranquilizing Shot, or his Fire Novas wear the raid down.
Abilities
Frenzy
He hits faster and burns the raid with Fire Nova until a hunter removes it.
Fire Nova
Fire damage to the whole raid.
Shadow Flame
A cone of shadow fire in front of him. Deadly without an Onyxia Scale Cloak.
Wing Buffet
Knocks back everyone in front of him and lowers the tank’s threat.
Your job
Tanks
Two tanks swap on Wing Buffet, as on Firemaw.
Healers
Fire Nova hits everyone; more while he’s frenzied.
Melee damage
At his side.
Ranged damage
Spread out; the hunters handle Frenzy.
Class jobs
Hunter
Tranquilizing Shot on every Frenzy, in a rotation of two or three hunters.
What gets people killed
- A frenzy nobody removes.
- No Onyxia Scale Cloak: Shadow Flame kills.
Boss 7 of 8
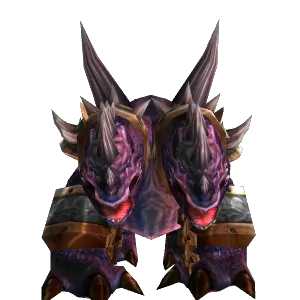
Chromaggus
A two-headed hound with two of five possible breaths. His Brood Afflictions stack up on players, and a player with all five is mind-controlled.
Abilities

Incinerate
A breath of fire damage.

Corrosive Acid
A breath that damages and lowers armor.

Frost Burn
A breath that damages and slows attacks.

Time Lapse
A breath that stuns and halves health for a moment.
Ignite Flesh
A breath that burns, stacking.

Brood Affliction
Five colours, landing on random players: Black, Blue, Bronze, Green and Red. Bronze stuns and is only cured by Hourglass Sand.

Chromatic Mutation
A player with all five afflictions is mind-controlled for good.
Frenzy
He attacks faster until a hunter removes it; at 20% he enrages.
Your job
Tanks
Tank him in a spot where the rest of the raid can hide from his breaths behind the walls of the room. Swap when stacks get high.
Healers
Cure afflictions all fight: decurse, dispel, cure poison and disease, and use Hourglass Sand on Bronze. Nobody may collect all five.
Melee damage
Out of the breath’s path. Use your Hourglass Sand if you get Bronze.
Ranged damage
Hide from the breaths, and come out between them. At 20%, burn him down.
Class jobs
Hunter
Tranquilizing Shot on Frenzy.
Mage
Remove Black, the curse. (Blue is magic, Green a poison, Red a disease.)

Druid
Remove Black (curse) and Green (poison).
Priest
Dispel Blue (magic) and cure Red (disease).
Paladin
Cleanse Blue, Green and Red.
What gets people killed
- Chromatic Mutation: a player mind-controlled for good is a lost character on Hardcore. Cure afflictions before anyone collects five.
- Running out of Hourglass Sand.
- Standing in line of a breath.
Boss 8 of 8
Nefarian
Phase 1: Lord Victor Nefarius sends drakonids from both sides. Phase 2: Nefarian lands and calls out a class every 30 seconds. Phase 3 at 20%: the dead drakonids rise again.
Abilities

Shadow Bolt VolleyLord Victor Nefarius
Phase 1: shadow bolts at several players.

FearLord Victor Nefarius
Phase 1: fears players near him.
Shadow Flame
A cone of shadow fire. Deadly without an Onyxia Scale Cloak.
Bellowing Roar
Fears everyone nearby.
Veil of Shadow
A curse that cuts healing taken. Remove it from the tank.
Class calls
Every 30 seconds, one class is cursed: warriors forced into Berserker Stance, priests’ heals hurt, mages polymorph allies, rogues pulled to him, druids forced into Cat Form, hunters’ ranged weapons break, shamans drop corrupted totems, paladins shield him, warlocks summon Infernals.
Your job
Tanks
Phase 1: tanks hold the drakonids on each side. Phase 2: the main tank takes Nefarian facing away from the raid, with a Fear Ward or Tremor Totem. Phase 3: tanks pick up the bone constructs.
Healers
Shadow Flame and fears make phase 2 bursty. When the priest call comes, priests stop healing; others pick up the slack.
Melee damage
At his sides. Learn your class call and what to do during it.
Ranged damage
Phase 1: kill the drakonids as they come in. Phase 3: area damage on the bone constructs.
Class jobs
Priest
Fear Ward the tank. During your class call, your heals damage their target: use shields and stop casting heals.
Mage
During your call you polymorph raid members: they have to be dispelled.
Warlock
During your call, Infernals appear by you: banish them.
Shaman
During your call, corrupted totems appear: kill them quickly. Tremor Totem for the tank (Horde).
Hunter
Your call breaks your ranged weapon: switch to melee for a moment.
Warrior
Your call forces Berserker Stance: you take more damage, so tanks need more healing.
Rogue
Your call teleports you in front of him: move out of the breath at once.
What gets people killed
- No Onyxia Scale Cloak: Shadow Flame kills.
- The rogue class call putting rogues in front of him during Shadow Flame.
- Healing during the priest call.
- A tank without a fear answer: when Bellowing Roar fears them, Nefarian turns on the raid.
Staying alive on Hardcore
There are no resurrections on a Hardcore realm: a soulstone, a battle resurrection or a spirit healer won’t bring anyone back. These habits keep a raid alive here.
- Everyone has an Onyxia Scale Cloak equipped before the drakes. Check, don’t assume.
- Hearthstones off cooldown at Vaelastrasz, and the order of tanks agreed.
- Bring Hourglass Sand for Chromaggus and assign who cures which affliction.
- In the Suppression Room, slow is safe: let rogues clear the devices.
Frequently asked questions
How do I get attuned to Blackwing Lair?
Loot Blackhand’s Command from the Scarshield Quartermaster in Blackrock Mountain, then kill General Drakkisath in Upper Blackrock Spire and touch the Orb of Command behind him. After that, the Orb of Command near the Blackrock Spire entrance takes you in.
Do I need the Onyxia Scale Cloak?
Yes, every raider: Firemaw, Ebonroc, Flamegor and Nefarian breathe Shadow Flame, which kills without it.
How do Hardcore raids survive Vaelastrasz?
Kill him fast, and anyone who gets Burning Adrenaline uses their Hearthstone at once. The debuff makes it instant and leaving the raid removes it. Tanks queue up so the next one can take over.
What is Hourglass Sand for?
It’s the only cure for Chromaggus’s Bronze affliction. Dragonkin in Blackwing Lair drop it.
More guides


 Raid loot by boss
 Gear helper