


Zul’Gurub Raid Guide for WoW Classic Hardcore
Every Zul’Gurub boss explained for new raiders, from High Priestess Jeklik to Hakkar: abilities, each role’s job, the class jobs, the optional bosses, and what gets people killed on Hardcore.
By Marc · Updated October 28, 2026
Zul'Gurub
Overview
Zul’Gurub is the Gurubashi trolls’ capital in northern Stranglethorn Vale, a 20-player raid that resets every three days. Hakkar the Soulflayer waits at the end, and five High Priests guard the way, each one giving Hakkar one of their powers while they live.
The raid is shorter than the 40-player ones, but its fights are full of single-player mechanics: Mandokir’s gaze, Jin’do’s mind-control totem, Hakkar’s Corrupted Blood. On a Hardcore realm, each of those is one player’s mistake away from a death, and Mandokir grows stronger with every one.
20
Players
10
Bosses
60
Level
3 days
Lockout
Getting in
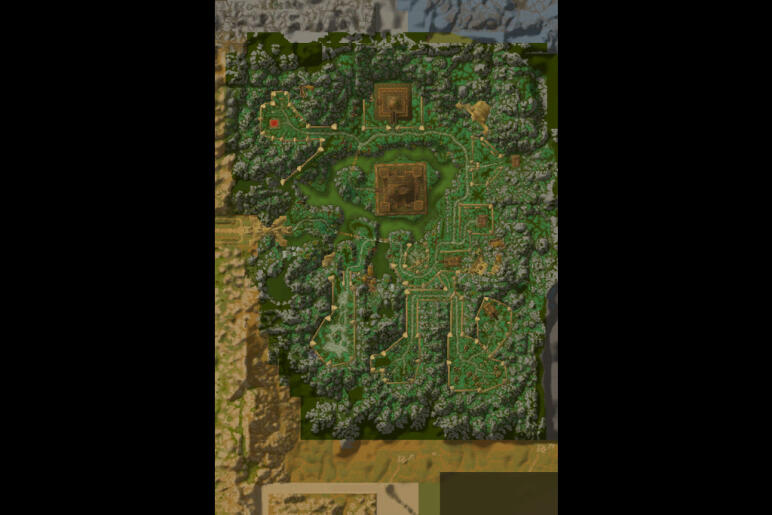
- The entrance is in the northeast of Stranglethorn Vale. No attunement is needed.
- The Zandalar Tribe, on Yojamba Isle off the coast, trades the coins and bijous the raid drops for reputation, class sets and enchantments.
- Two bosses are optional and need preparation. The Edge of Madness boss is summoned at the Brazier of Madness with Gurubashi Mojo Madness, made by alchemists; which of its four bosses appears changes every two weeks. Gahz’ranka is fished up with a Mudskunk Lure from a pool inside the raid.
Preparation, role by role
 Tanks
Several fights have a second tank job (Mandokir’s raptor, Thekal’s two Zealots, Venoxis’s snakes), and two need the tank to swap targets fast. On Hakkar, his mind control can take a tank: be ready to pick him up.
 Healers
Lots of poison and nature damage: Venoxis, Mar’li, Hakkar. Know what you can cure. On Jin’do, the players he teleports into his pit need healing.
 Melee damage
Plenty of knockbacks and fears, and Mandokir’s gaze: when he watches you, stop everything.
 Ranged damage
Interrupt heals (Jeklik, Mar’li’s Drain Life), kill totems on Jin’do, and spread out for Hakkar.
What each class brings

Priest
Dispel Jin’do’s Hex off the tank, and Fear Ward against Jeklik and Mandokir.

Mage
Decurse Jin’do’s Delusions only when the raid leader says so, and polymorph mind-controlled players on Hakkar.

Shaman
Poison Cleansing Totem for Venoxis and Mar’li; Tremor Totem against fears (Horde).

Hunter
Tranquilizing Shot on Thekal’s Frenzy.

Rogue
Kick heals: Jeklik’s Greater Heal, Mar’li’s Drain Life, Zealot Lor’Khan’s heals.

Druid
Cure poisons on Venoxis and Mar’li, and remove curses.
Consumables
- Greater Nature Protection Potions for Venoxis, Mar’li and Hakkar.
- Major Healing and Mana Potions and healthstones.
- Restorative Potions or Elixirs of Poison Resistance help on the poison fights.
Dangerous trash
On Hardcore, the trash between the bosses kills more raiders than the bosses do.

Gurubashi Berserkers
Huge trolls that knock players away and fear them. Pull them one at a time and tank them facing a wall.

Razzashi packs
Raptors, snakes and spiders around the first bosses. Clear them fully before each boss: a fear can send players into a pack nobody pulled.

Bloodseeker bats
Bat packs near Jeklik that move fast and swarm the healers. Area damage kills them.
The bosses
In the order most raids kill them.

Boss 1 of 10
High Priestess Jeklik
Phase 1 in bat form with her bats; phase 2 from 50% as a troll priest who heals herself, while bat riders drop fire on the raid.
Abilities

Sonic Burst
Bat form: silences everyone near her.

Swoop
Bat form: hits and knocks back players in front of her.

Mind Flay
Troll form: channels shadow damage on a player.

Greater Heal
Troll form: a big heal on herself. Interrupt every one.
Your job
Tanks
Tank her where the raid can reach her, facing away. A second tank picks up the bats in phase 1.
Healers
Stay out of Sonic Burst range in phase 1; you can’t heal while silenced. Move out of fire in phase 2.
Melee damage
Interrupt Greater Heal in phase 2. Move out of the fire the bat riders drop.
Ranged damage
Area damage on the bats; interrupt her heals; out of the fire.
Class jobs
Rogue
Kick Greater Heal.
Shaman
Earth Shock Greater Heal from range.
Mage
Counterspell Greater Heal, and area damage on the bats.
What gets people killed
- Healers silenced in phase 1 while the bats are loose.
- Standing in the fire in phase 2.

Boss 2 of 10
High Priest Venoxis
A priest with four cobras; from 50% he turns into a giant snake that fills the room with poison clouds.
Abilities

Holy Nova
Troll form: damage to everyone near him.

Holy Fire
Troll form: a burn on a random player.

Poison Cloud
Snake form: clouds of poison that stay on the ground. Move out.

Parasitic Serpent
Snake form: small snakes that attack players.
Your job
Tanks
Off-tanks take the four cobras first; the main tank takes Venoxis. In snake form, drag him out of his poison clouds.
Healers
Lots of poison damage in phase 2: cure it, and stay out of the clouds.
Melee damage
Kill the cobras, then Venoxis. Step back from Holy Nova if you’re low.
Ranged damage
Spread out. In phase 2, move with the tank and out of clouds.
Class jobs
Shaman
Poison Cleansing Totem.
Druid
Cure and Abolish Poison.

Paladin
Cleanse poisons.
What gets people killed
- Standing in a Poison Cloud: it stacks up fast.
- Cobras left loose on the healers.

Boss 3 of 10
High Priestess Mar’li
She switches between a troll priestess with poison volleys and a giant spider that webs and charges. Her eggs hatch into spiders that grow.
Abilities

Poison Bolt Volley
Troll form: poison on everyone near her.

Drain Life
Troll form: drains a player’s health. Interrupt it.

Spawn of Mar’li
Spiders hatch from eggs and grow stronger the longer they live.

Enveloping Webs
Spider form: roots everyone near her, after which she often charges someone else.
Corrosive Poison
Spider form: a poison that eats armor.
Your job
Tanks
Tank her where the raid can stay spread. When she charges away after her webs, taunt her back at once; a second tank picks up the spiders.
Healers
Poison damage everywhere: cure it, and don’t stand near her in troll form.
Melee damage
Kill the spiders the moment they hatch. Interrupt Drain Life.
Ranged damage
Stay out of the volley’s range; kill the spiders.
Class jobs
Rogue
Kick Drain Life.
Shaman
Poison Cleansing Totem, and Earth Shock on Drain Life.
What gets people killed
- Spiders left to grow.
- Her webs rooting the melee while she charges a healer.

Boss 4 of 10
Bloodlord Mandokir
Mandokir and his raptor Ohgan. When he watches a player, that player must stop everything, or he charges and kills them. He levels up with every death.
Abilities

Threatening Gaze
He stares at a player for a few seconds. If they move, attack or cast, he charges and kills them.

Level Up
Every player he kills makes him a level stronger.

Whirlwind
Hits everyone around him.

Charge
Charges a player.

Mortal Strike
A big hit that cuts healing taken.
Your job
Tanks
One tank on Mandokir, one on Ohgan, apart from each other. If he watches you, stop attacking for those seconds; the other tank holds.
Healers
Mortal Strike makes the tank hard to heal. If he watches you, stop casting: let the others heal.
Melee damage
Step out of Whirlwind. When he watches you, stand completely still and do nothing until it ends.
Ranged damage
Same rule: watched means frozen. Stay spread so his charge only hits one player.
Class jobs
Priest
Fear Ward and big heals on the tank through Mortal Strike.
What gets people killed
- Moving, attacking or casting while he watches you. It’s the most common death in Zul’Gurub.
- Every death makes him stronger, so one mistake can lead to more.
- Whirlwind on melee who don’t step out.

Boss 5 of 10
Edge of Madness
An optional boss summoned with Gurubashi Mojo Madness. One of four appears, changing every two weeks: Gri’lek, Hazza’rah, Renataki or Wushoolay.
Abilities

AvatarGri’lek
He grows, chases a random player and roots them.

Mana BurnHazza’rah
Burns mana; he also puts players to sleep and summons nightmare illusions.

Thousand BladesRenataki
He vanishes, then strikes from the shadows.

Chain LightningWushoolay
Lightning that jumps between players standing close.
Your job
Tanks
Gri’lek: let him chase his target and pick him up after. Renataki: be ready to re-taunt when he comes out of stealth.
Healers
Hazza’rah: stay spread, so his sleep doesn’t take all of you. Wushoolay: keep everyone topped up against the lightning.
Melee damage
Hazza’rah: kill the illusions fast. Gri’lek: get out of his way when he chases.
Ranged damage
Wushoolay: spread out so Chain Lightning can’t jump.
What gets people killed
- Wushoolay’s lightning on a clumped raid.
- Gri’lek catching the player he chases.

Boss 6 of 10
Gahz’ranka
An optional boss fished up with a Mudskunk Lure. His geysers throw the raid into the air.
Abilities

Massive Geyser
Throws players high into the air.

Gahz’ranka Slam
A knockback around him.

Frost Breath
A frost breath in front of him that drains mana.
Your job
Tanks
Tank him in the water, facing away from the raid.
Healers
Keep everyone high on health: geysers end in a fall.
Melee damage
Fight him in the water, so a geyser drops you into it.
Ranged damage
Stand in the water too, if you can.
What gets people killed
- Fall damage from Massive Geyser onto land, at low health.

Boss 7 of 10
High Priest Thekal
Thekal and his two Zealots must die within a few seconds of each other, or they get back up. Then he turns into a tiger.
Abilities

Zealot Lor’Khan
Heals the others and shields himself.

Zealot Zath
Gouges and blinds his tank.

Force Punch
Tiger form: knocks back players near him.
Charge
Tiger form: charges a random player.

Frenzy
Tiger form: attacks faster until removed.
Your job
Tanks
Phase 1: three tanks, one per troll, apart. Phase 2: the tiger, with a second tank for the Zulian Guardians he calls.
Healers
Phase 1 is steady; phase 2 hits harder and he charges at random players.
Melee damage
Phase 1: bring all three low together, then kill them at the same moment. Interrupt Lor’Khan’s heals.
Ranged damage
Phase 1: follow the raid leader’s calls to balance the three. Phase 2: spread out against his charge.
Class jobs
Hunter
Tranquilizing Shot on his Frenzy.
Rogue
Kick Lor’Khan’s heals.
What gets people killed
- One of the three dying too early: they come back with full health and the fight drags on.
- Charges into low-health healers in phase 2.
Boss 8 of 10
High Priestess Arlokk
A troll who vanishes and marks players for her panthers, which pour in from the sides.
Abilities

Mark of Arlokk
Marks a player: every panther goes for them.

Vanish
She disappears and comes back somewhere else.
Whirlwind
Hits everyone around her.
Gouge
Stuns her tank and drops their threat.
Your job
Tanks
Two tanks near her: when she gouges one, the other takes over. Off-tanks gather the panthers.
Healers
The marked player gets attacked by every panther: keep them alive.
Melee damage
Kill panthers when she’s gone; step out of Whirlwind.
Ranged damage
Area damage on the panthers, but not until a tank has them.
Class jobs
Mage
Frost Nova and area damage on the panthers.

Warlock
Area damage on the panthers once they’re gathered.
What gets people killed
- The marked player alone with the panthers.
- Area damage pulling panthers before the tanks have them.

Boss 9 of 10
Jin’do the Hexxer
A witch doctor who hexes his tank, mind-controls players with a totem, heals with a ward, curses players to see shades, and teleports some into a pit of skeletons.
Abilities

Hex
Turns the tank into a frog. Dispel it.

Brain Wash Totem
A totem that mind-controls a player. Destroy it at once.

Powerful Healing Ward
Heals Jin’do. Destroy it.

Delusions of Jin’do
A curse that shows shades only the cursed player can see and kill.
Your job
Tanks
Tank him in the middle. When he hexes you, the second tank taunts until it’s dispelled.
Healers
Dispel Hex fast. Players teleported into the pit need heals while they climb out.
Melee damage
Kill totems and wards the moment they appear. If you’re cursed, kill the shades only you can see.
Ranged damage
Totems first, then wards, then Jin’do. Cursed players kill their shades.
Class jobs
Priest
Dispel Hex off the tank.
Paladin
Cleanse Hex.
Mage
Polymorph a mind-controlled player.
Hunter
Shoot totems and wards from range.
What gets people killed
- A Brain Wash Totem left up: a mind-controlled player attacks the raid.
- Shades nobody kills, attacking a cursed player.

Boss 10 of 10
Hakkar
The Soulflayer. Every 90 seconds he drains the raid’s blood; players poisoned by a Son of Hakkar poison him instead. Each High Priest left alive gives him an extra ability.
Abilities

Blood Siphon
Drains every player’s health to heal himself, unless they carry Poisonous Blood.

Poisonous BloodSon of Hakkar
A Son of Hakkar leaves a poison cloud when it dies. Players who stand in it poison Hakkar when he drinks.

Corrupted Blood
A disease that jumps to players nearby.

Cause Insanity
Mind-controls a player.
Will of Hakkar
Mind-controls a player who then fights for him.
Your job
Tanks
Two tanks: if he mind-controls the first, the second taunts. Off-tanks bring the Sons of Hakkar to the raid.
Healers
Corrupted Blood ticks on everyone it reaches: heal it and stay apart. Top everyone up before Blood Siphon.
Melee damage
Before each Blood Siphon, kill a Son of Hakkar and stand in its poison cloud. Stay apart for Corrupted Blood.
Ranged damage
Spread out, and go to the poison cloud before every Blood Siphon.
Class jobs
Mage
Polymorph a mind-controlled player.
Priest
Don’t cure Poisonous Blood: the raid needs it on every Blood Siphon.
What gets people killed
- Missing the poison before Blood Siphon: he heals and the raid loses a lot of health at once.
- Players standing close together, spreading Corrupted Blood.
- Every High Priest you skipped makes him harder.
Staying alive on Hardcore
There are no resurrections on a Hardcore realm: a soulstone, a battle resurrection or a spirit healer won’t bring anyone back. These habits keep a raid alive here.
- Kill every High Priest: each one left alive makes Hakkar harder.
- When Mandokir watches you, freeze. Say it in the raid before the pull.
- Clear the trash around each boss; fears and knockbacks are everywhere here.
- On Jin’do and Hakkar, a mind-controlled player is crowd-controlled, never killed.
Frequently asked questions
Is there an attunement for Zul’Gurub?
No. The entrance is in northeastern Stranglethorn Vale, and anyone level 60 can go in.
How do you summon the Edge of Madness boss?
An alchemist makes Gurubashi Mojo Madness, which is used at the Brazier of Madness. Which of the four bosses appears changes every two weeks.
How do you summon Gahz’ranka?
A player fishes with a Mudskunk Lure from a pool inside Zul’Gurub.
How often does Zul’Gurub reset?
Every three days.
More guides


 Raid loot by boss
 Gear helper