


Naxxramas Raid Guide for WoW Classic Hardcore
Every Naxxramas boss explained for new raiders, wing by wing up to Kel’Thuzad: abilities, each role’s job, the class jobs, frost resistance for Sapphiron, the dangerous trash, and what gets people killed on Hardcore.
By Marc · Updated October 28, 2026
Naxxramas
Overview
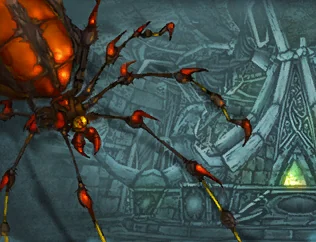
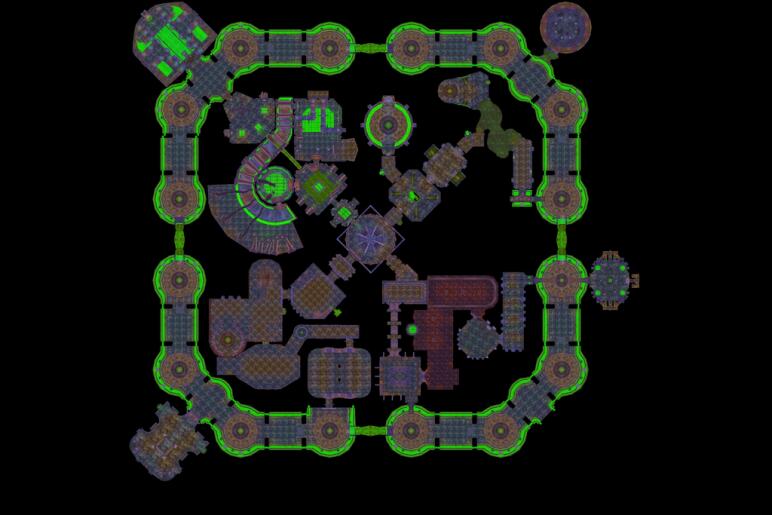
Naxxramas is Kel’Thuzad’s floating necropolis over the Eastern Plaguelands, the last and hardest Classic raid. Its fifteen bosses are spread over four wings (the Arachnid, Plague, Military and Construct Quarters), and the Frostwyrm Lair with Sapphiron and Kel’Thuzad opens once all four are done. It drops Tier 3.
Almost every fight here has a mechanic that kills on one mistake: Heigan’s dance, Thaddius’s jump and polarity, Sapphiron’s Frost Breath, Kel’Thuzad’s Shadow Fissures. On a Hardcore realm, Naxxramas is where raids are most likely to lose people, so each fight is worth practising in your head before the pull.
40
Players
15
Bosses
60
Level
7 days
Lockout
Getting in
- Archmage Angela Dosantos at Light’s Hope Chapel in the Eastern Plaguelands attunes you: it needs Honored with the Argent Dawn and a fee in gold and materials. At Revered the fee is lower, and at Exalted it’s free.
- The four wings can be done in any order. Each one ends in a portal back to the entrance; when all four are done, the Frostwyrm Lair opens.
- Frost resistance gear is needed for Sapphiron, for the whole raid. Crafters make most of it from patterns the Argent Dawn sells and Frozen Runes found in Naxxramas, so start early.
- Shadow Protection Potions are needed for Loatheb, and a lot of Greater Fire, Frost and Nature Protection Potions help elsewhere.
Preparation, role by role
 Tanks
Patchwerk needs three or four tanks with very high health to take Hateful Strikes. The Four Horsemen need four tanks rotating between corners. On Razuvious, priests tank with mind-controlled understudies.
 Healers
Loatheb only lets each healer cast one heal per minute, so the raid relies on rotations. Healers rotate between corners on the Four Horsemen too. Cure disease on Heigan and poison on Maexxna.
 Melee damage
Lots of movement: Heigan’s dance, Grobbulus’s bombs, Thaddius’s polarity. Stay out of Kel’Thuzad’s fissures.
 Ranged damage
Spread out on Sapphiron and Kel’Thuzad. On Gluth, help slow the zombies after Decimate.
What each class brings

Priest
Mind Control the Death Knight Understudies on Razuvious; Shackle Undead the Guardians of Icecrown on Kel’Thuzad; Mind Control a Worshipper for Faerlina.

Mage
Remove curses on Noth and Sapphiron (Life Drain); slow Gluth’s zombies; interrupt Kel’Thuzad’s Frostbolt.

Druid
Remove curses too, and cure poisons on Maexxna.

Hunter
Tranquilizing Shot on Gluth’s Frenzy; Frost Trap the zombies.

Paladin
Cleanse diseases on Heigan and poison on Maexxna (Alliance).

Shaman
Frost Resistance Totem on Sapphiron, Poison Cleansing on Maexxna (Horde).

Rogue
Interrupt Kel’Thuzad’s Frostbolt; kill spores on Loatheb.

Warlock
Healthstones; Banish isn’t needed much here, so you’re damage almost everywhere.
Consumables
- Frost resistance gear and Greater Frost Protection Potions for Sapphiron.
- Shadow Protection Potions for Loatheb.
- Greater Nature Protection Potions for Faerlina and Grobbulus.
- Major Healing and Mana Potions, healthstones, and Restorative Potions.
Dangerous trash
On Hardcore, the trash between the bosses kills more raiders than the bosses do.

Spider wing packs
Venom stalkers and necro stalkers that charge and poison, and webs that root. Cure poisons constantly.

Plague wing packs
Plague slimes and stoneskin gargoyles, which turn to stone to heal: kill them before they do. Before Heigan, the Eye Stalks only hit nearby players.

Military wing packs
Death knights and their captains hit very hard and knock players away; the riders’ horses come after the riders.

Construct wing packs
Patchwork golems, bile retchers and living monstrosities with chain lightning. Patchwork Golems stomp and cleave everyone around them.
The bosses
In the order most raids kill them.
Boss 1 of 15
Anub’Rekhan
Arachnid Quarter. A giant crypt lord who impales in lines and, every 90 seconds, surrounds himself with a Locust Swarm that the tank has to kite him out of.
Abilities

Impale
A line of spikes throwing players into the air.

Locust Swarm
Silences and badly hurts everyone near him. He also moves slowly during it.
Crypt Guards
Adds that come with him; when they die, scarabs rise from the corpse.
Your job
Tanks
During Locust Swarm, kite him around the room, ahead of the swarm. An off-tank holds the Crypt Guards.
Healers
Stay out of the swarm’s reach; heal the kiting tank from range.
Melee damage
Run out when the swarm starts and come back when it ends.
Ranged damage
Don’t stand in a line with the tank (Impale). Area damage on scarabs.
What gets people killed
- Being caught in the Locust Swarm.
- A clumped raid getting impaled together.
Boss 2 of 15
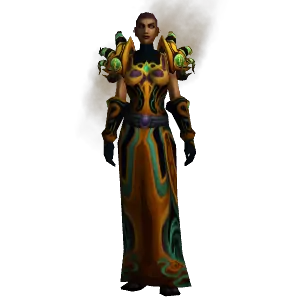
Grand Widow Faerlina
Arachnid Quarter. She enrages every minute; a priest mind-controls one of her worshippers and sacrifices it on her to remove the enrage.
Abilities

Poison Bolt Volley
Poison on several players.

Rain of Fire
Fire on an area. Move out.

Enrage
Every minute she hits much harder.

Widow’s EmbraceNaxxramas Worshipper
A worshipper sacrificing itself on her removes her enrage.
Your job
Tanks
Main tank on Faerlina; off-tanks on the Followers. Leave the Worshippers for the priests.
Healers
Poison damage on the raid; cure it.
Melee damage
Don’t kill the Worshippers: they’re needed for her enrages.
Ranged damage
Out of the Rain of Fire. Kill the Followers.
Class jobs
Priest
Mind Control a Worshipper and use Widow’s Embrace on Faerlina when she enrages.
What gets people killed
- Killing the Worshippers too early: then nothing stops her enrage.
- Standing in Rain of Fire.
Boss 3 of 15
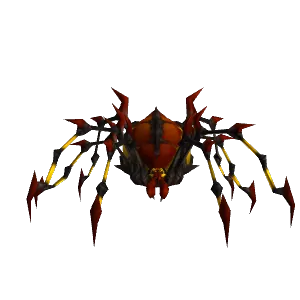
Maexxna
Arachnid Quarter. A giant spider who wraps players to the walls, stuns the whole raid with Web Spray every 40 seconds and poisons her tank.
Abilities

Web Wrap
Throws a player to the wall in a cocoon. Kill the cocoon to free them.
Web Spray
Stuns everyone for 8 seconds. Spiderlings come right after.

Necrotic Poison
Cuts the tank’s healing taken by 90%. Cure it at once.

Poison Shock
Nature damage in front of her.
Enrage
At 30% she hits much harder.
Your job
Tanks
Face her away from the raid. Before each Web Spray, ask for shields and heal-over-time spells: nobody can heal you for 8 seconds.
Healers
Before Web Spray, shield and renew the tank. Cure Necrotic Poison the moment it lands.
Melee damage
Behind or beside her. Kill spiderlings after each Web Spray.
Ranged damage
Kill the cocoons on the walls, then the spiderlings.
Class jobs
Priest
Power Word: Shield and Renew on the tank before Web Spray.
Druid
Abolish Poison on the tank, and Rejuvenation before Web Spray.
Hunter
Shoot the cocoons on the walls.
What gets people killed
- The tank dying during Web Spray, when nobody can heal.
- Necrotic Poison left on the tank.
Boss 4 of 15
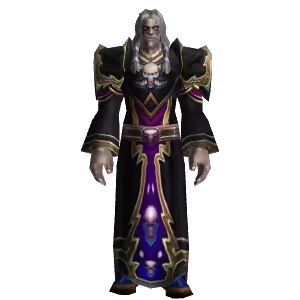
Noth the Plaguebringer
Plague Quarter. A necromancer who curses the raid, blinks around, and leaves for his balcony while undead waves attack.
Abilities

Curse of the Plaguebringer
If it isn’t removed within 10 seconds, the player explodes in shadow damage on everyone near.
Blink
He teleports and forgets his threat.
Balcony
He leaves for his balcony while plagued champions and guardians attack.
Your job
Tanks
Several tanks around him, so whoever is near after a Blink taunts. During the balcony phase, gather the adds.
Healers
Heal through the curse explosions when one gets missed; heal the add tanks.
Melee damage
Kill the adds during the balcony phase.
Ranged damage
Area damage on the waves once they’re gathered.
Class jobs
Mage
Remove Curse of the Plaguebringer within 10 seconds.
Druid
Remove the curse too.
What gets people killed
- A curse nobody removes: it explodes on everyone near.
- Adds loose on the healers in the balcony phase.
Boss 5 of 15
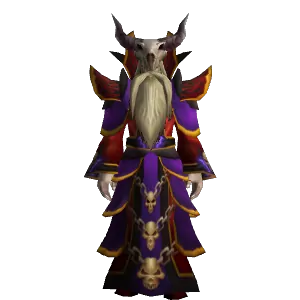
Heigan the Unclean
Plague Quarter. The floor is split into four lanes that erupt one after another; the raid dances from lane to lane. In his second phase the dance gets much faster.
Abilities

Eruption
The floor erupts lane by lane. Standing in an erupting lane is almost always fatal.
Decrepit Fever
A disease that cuts health. Cure it.

Mana Burn
Burns mana around him.
Platform phase
Every 90 seconds he teleports to his platform and the eruptions speed up for 45 seconds.
Your job
Tanks
Lead him through the lanes, following the dance with the melee.
Healers
Most healers stand on the safe platform near the entrance. Cure Decrepit Fever.
Melee damage
Dance with the tank: move to the next lane the moment yours is about to erupt.
Ranged damage
Stand on the platform if you can, and stay out of the lanes during his platform phase.
Class jobs
Priest
Cure Disease on Decrepit Fever.
Paladin
Cleanse Decrepit Fever.
What gets people killed
- Missing a step of the dance. Learn the order before the pull.
- Lag during the fast dance; stay close to the next safe lane.
Boss 6 of 15
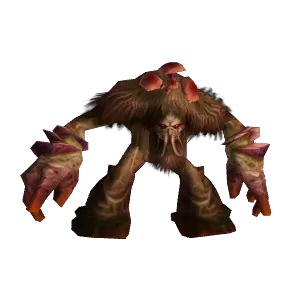
Loatheb
Plague Quarter. A giant fungus that lets each healer cast only one heal per minute, and hits the whole raid with Inevitable Doom ever more often.
Abilities

Corrupted Mind
After a heal, a healer can’t heal again for about a minute. Healers take turns.

Inevitable Doom
Big shadow damage on everyone after 10 seconds; it comes faster later in the fight.

Summon Spore
Spores appear; killing one gives the players nearby a big critical strike bonus.
Your job
Tanks
Steady damage; the healers’ rotation keeps you alive.
Healers
Follow the healing rotation exactly: one big heal when it’s your turn.
Melee damage
Take turns killing spores for the critical strike bonus.
Ranged damage
Burn him: the longer the fight, the more Inevitable Dooms.
Class jobs
Rogue
Kill spores in your group’s turn.
What gets people killed
- The late Inevitable Dooms without Shadow Protection Potions.
- A broken healing rotation leaving the tank without heals.
Boss 7 of 15
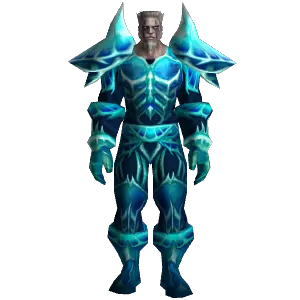
Instructor Razuvious
Military Quarter. His Unbalancing Strike kills any player tank, so priests mind-control his Death Knight Understudies and tank him with them.
Abilities

Unbalancing Strike
A huge hit that only an understudy can take.
Disrupting Shout
Burns mana and hurts everyone near him.

TauntDeath Knight Understudy
The priest uses it to take him.

Bone BarrierDeath Knight Understudy
A shield for the understudy the priest controls.
Your job
Tanks
Player tanks hold the understudies the priests aren’t controlling.
Healers
Heal the understudy that has Razuvious.
Melee damage
On Razuvious; step back during Disrupting Shout if you use mana.
Ranged damage
Stay out of Disrupting Shout’s range.
Class jobs
Priest
Mind Control an understudy, Taunt Razuvious, and use Bone Barrier; two priests swap so one is always ready.
What gets people killed
- A player tank taking him: Unbalancing Strike can kill them.
- A mind control breaking with no second priest ready.
Boss 8 of 15
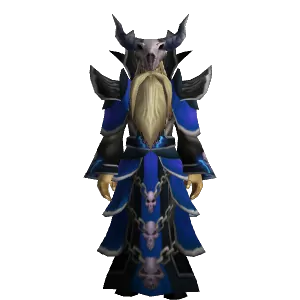
Gothik the Harvester
Military Quarter. The raid splits into two halves: the living side fights his trainees, knights and riders, which come back on the dead side as spirits. After about four minutes he comes down himself.
Abilities
Living side
Trainees, death knights and riders attack. Every one killed rises again on the other side.

Shadow Bolt
A heavy hit on a random player once he’s down.

Harvest Soul
A stacking debuff lowering everyone’s stats.
Your job
Tanks
Tanks on both sides pick up the adds as they come.
Healers
Split evenly over both sides.
Melee damage
Mostly on the dead side, where the spirits come.
Ranged damage
Area damage on the waves; don’t let the dead side get overrun.
What gets people killed
- One side overrun because it got too few players.
- Riders and their horses arriving at the same time.

Boss 9 of 15
The Four Horsemen
Military Quarter. Four death knights in the corners of a room. Each one leaves a mark that hurts more with every stack, so tanks and healers rotate between corners.
Abilities

Marks
Each Horseman’s attacks leave a stacking mark that hurts more each time. Move away to let your marks drop.

MeteorThane Korth’azz
Huge damage split between everyone near the target: stand together.

Void ZoneLady Blaumeux
A shadow zone on the ground. Move out.

Righteous FireHighlord Mograine
A burn on his target.

Holy WrathSir Zeliek
Holy damage that jumps between players standing close: spread.
Your job
Tanks
Four or more tanks rotate between corners on a fixed schedule, so nobody collects too many marks.
Healers
Healers rotate between corners with their tanks; heal from where you can reach.
Melee damage
Stack on Thane (Meteor), spread on Zeliek (Holy Wrath).
Ranged damage
Burn the Horseman your group is on, following the rotation.
What gets people killed
- Missing a rotation step: marks stack until they kill.
- Clumping near Zeliek, or spreading near Thane.
- Standing in Void Zones.
Boss 10 of 15
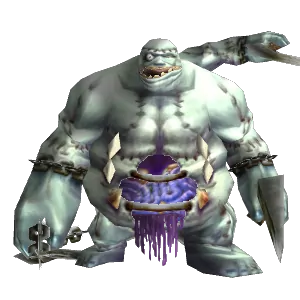
Patchwerk
Construct Quarter. A pure damage race. Every second or so he hits a player in melee range with a Hateful Strike, aimed at whoever has the most health, so three or four tanks with very high health stand in melee range to take them.
Abilities
Hateful Strike
A huge hit on one of the players in melee range: the one with the most health.
Frenzy
At 5% he hits much harder.
Berserk
After 7 minutes he kills the raid.
Your job
Tanks
Main tank plus three or four Hateful Strike tanks, all with more health than any melee damage dealer.
Healers
Healers are assigned to the Hateful Strike tanks; they take enormous hits.
Melee damage
Keep your health below the tanks’ — don’t use health buffs that put you above them.
Ranged damage
All damage: the 7-minute Berserk is the clock.
What gets people killed
- A melee damage dealer with more health than the Hateful Strike tanks.
- Running into the Berserk.
Boss 11 of 15
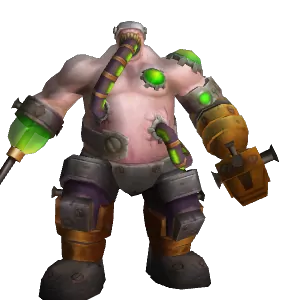
Grobbulus
Construct Quarter. He injects players with a slime bomb; each one has to run to the edge of the room before it goes off and leaves a poison cloud.
Abilities
Mutating Injection
After about 10 seconds the player explodes in poison and leaves a cloud and a slime.
Slime Spray
A frontal spray; every player it hits spawns a slime.
Poison Cloud
Clouds he leaves as he’s tanked around the room.
Your job
Tanks
Tank him around the room’s edge, slowly, so the clouds stay behind the raid. Face him away from everyone.
Healers
Heal the injected player as they run out.
Melee damage
Behind him, never in front.
Ranged damage
If you’re injected, run to the edge away from the raid at once. Kill slimes.
What gets people killed
- An injected player exploding in the raid.
- Slime Spray on a group of players.
Boss 12 of 15
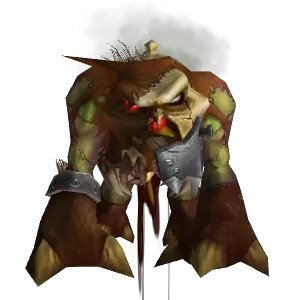
Gluth
Construct Quarter. A plague dog who eats zombies to heal. Every 105 seconds Decimate drops everyone, zombies too, to 5% health.
Abilities

Decimate
Everyone, players and zombies, falls to 5% health.

Mortal Wound
Stacking healing reduction on the tank. Swap tanks.

Terrifying Roar
Fears everyone near him.
Frenzy
He attacks faster until a hunter removes it.
Your job
Tanks
Two tanks swap on Mortal Wound. An off-tank kites the zombies.
Healers
After Decimate, heal everyone at once: everyone is at 5%.
Melee damage
On Gluth; after Decimate, kill zombies running to him.
Ranged damage
After Decimate, slow and kill the zombies before they reach Gluth.
Class jobs
Hunter
Tranquilizing Shot on Frenzy, and Frost Traps on the zombies.
Mage
Frost Nova and Blizzard on the zombies after Decimate.
What gets people killed
- Anything hitting you after Decimate: you’re at 5%.
- Zombies reaching Gluth and healing him.
Boss 13 of 15
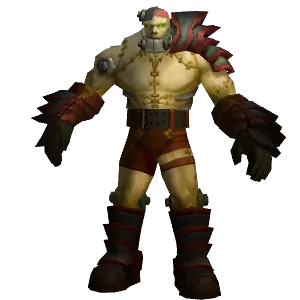
Thaddius
Construct Quarter. First Stalagg and Feugen on two platforms, then a jump across a gap to Thaddius, who gives every player a positive or negative charge every 30 seconds.
Abilities

Magnetic Pull
Phase 1: Stalagg and Feugen swap tanks across the platforms.

Polarity Shift
Phase 2: everyone gets a plus or minus charge. Standing next to an opposite charge hurts; next to a matching one boosts damage.

Chain Lightning
Phase 2: lightning jumping between players.

Ball Lightning
If nobody is in melee range, he throws lightning at the raid.
Your job
Tanks
Phase 1: one tank per platform; be ready when Magnetic Pull swaps you. Phase 2: hold Thaddius and keep someone in melee range.
Healers
Phase 2: move to your charge’s side after every shift; heal through chain lightning.
Melee damage
Phase 1: kill Stalagg and Feugen within seconds of each other, or the first gets back up. Then jump the gap. Phase 2: after every shift, go to your side.
Ranged damage
Phase 2: plus on one side, minus on the other. Check your charge after every shift.
What gets people killed
- Falling into the gap when jumping to Thaddius. Jump from the edge, straight, with full health.
- Standing on the wrong side after a Polarity Shift.
Boss 14 of 15
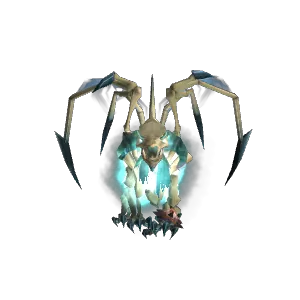
Sapphiron
Frostwyrm Lair. A frost wyrm whose aura freezes the whole raid all fight; frost resistance is required. In the air, he turns players to ice and breathes: hide behind an ice block or die.
Abilities

Frost Aura
Frost damage to everyone all fight. Frost resistance makes it bearable.

Life Drain
A curse that drains health. Remove it quickly.
Blizzard
A moving blizzard. Stay out.

Icebolt
In the air: freezes players into ice blocks.

Frost Breath
In the air: a breath that kills everyone not hiding behind an ice block.
Your job
Tanks
Face him away from the raid (Cleave, and his tail behind him).
Healers
Heal through Frost Aura all fight; decurse Life Drain if you can.
Melee damage
At his sides. In the air phase, spread out, then hide behind an ice block.
Ranged damage
Spread out in the air phase, so the Icebolts make several blocks, then hide behind one before the breath.
Class jobs
Mage
Remove Life Drain.
Druid
Remove Life Drain too.
Shaman
Frost Resistance Totem (Horde).
Paladin
Frost Resistance Aura (Alliance).
What gets people killed
- Not behind an ice block when Frost Breath lands.
- Too little frost resistance for the long fight.
- Standing in the moving Blizzard.
Boss 15 of 15
Kel’Thuzad
Frostwyrm Lair. Phase 1: waves of undead for about three minutes. Phase 2: Kel’Thuzad himself, with fissures, frost blasts and mind control. Phase 3 at 40%: Guardians of Icecrown.
Abilities

Shadow Fissure
A void on the ground under a player that kills after a few seconds. Move at once.
Frost Blast
Freezes a few players and drains their health. Heal them fast.

Detonate Mana
A mana user explodes, hurting players near them. Run out.

Frostbolt
A huge frostbolt on the tank. Interrupt it.

Chains of Kel’Thuzad
Mind-controls a few players.

Guardians of Icecrown
At 40% they join; priests shackle them.
Your job
Tanks
Phase 1: hold the abominations at the edge of the circle. Phase 2: hold Kel’Thuzad, with another tank ready in case Chains takes you.
Healers
Stand spread in your alcove. Heal Frost Blasted players at once.
Melee damage
Interrupt Frostbolt. Move out of fissures instantly.
Ranged damage
Spread out. Phase 1: kill soldiers before they reach the raid.
Class jobs
Priest
Shackle Undead the Guardians of Icecrown.
Rogue
Kick Frostbolt.
Mage
Counterspell Frostbolt, and polymorph mind-controlled players.
What gets people killed
- Not moving out of a Shadow Fissure. It kills.
- Detonate Mana next to other players.
- Frost Blasted players without heals.
- An unshackled Guardian loose in phase 3.
Staying alive on Hardcore
There are no resurrections on a Hardcore realm: a soulstone, a battle resurrection or a spirit healer won’t bring anyone back. These habits keep a raid alive here.
- Rehearse Heigan’s dance and Thaddius’s jump and polarity before you pull them.
- Frost resistance gear for Sapphiron, for everyone, before you enter the Frostwyrm Lair.
- Shadow Protection Potions for Loatheb, and a healing rotation that everyone knows.
- Mind-controlled players are crowd-controlled, never killed.
Frequently asked questions
How do I get attuned to Naxxramas?
Talk to Archmage Angela Dosantos at Light’s Hope Chapel in the Eastern Plaguelands. You need Honored with the Argent Dawn and a fee in gold and materials, which drops at Revered and disappears at Exalted.
Which Naxxramas wing should we do first?
Any order works. Many raids start with the Arachnid Quarter (Anub’Rekhan, Faerlina, Maexxna), which is the most forgiving.
How much frost resistance do I need for Sapphiron?
As much as your raid can gather: the whole raid takes frost damage all fight. Tanks and healers need the most.
More guides


 Raid loot by boss
 Gear helper